

TASER Defense
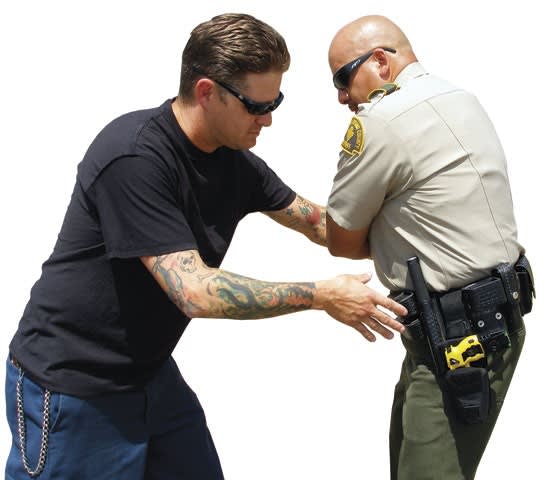
To prevent a subject from getting near any of your weapons, create a defensive wedge with your two arms and push the subject away. You should then be able to deploy your TASER from the proper distance.
Recently in San Diego, harbor police were dispatched to a call reporting that a man from a party cruise went overboard and needed to be rescued from the water. When the officers arrived and began to help the man out of the water, he started fighting. During the fight, the man was able to disarm one of the officers and obtain the officer's TASER. The man struck the officer with the TASER and then tried to take the officer's firearm. A backup officer shot and killed the man.
In an effort to research how many officers have been disarmed of their TASER, I contacted TASER International public relations manager Hilary Gibeaut. I asked her if she had any information on officers that have had their TASER taken away from them by combative suspects. Gibeaut provided me with several news articles documenting incidents where a suspect has taken a TASER away from an officer.
The information from Gibeaut confirmed that in the past few years there have been numerous incidents where suspects have grabbed the arresting officer's TASER and used or attempted to use the TASER against the officer. In some of these cases, the officers needed to use deadly force to subdue the combative suspects. Gibeaut told me that TASER does not teach weapon retention tactics. She said TASER leaves that up to the defensive tactics instructor at the agency that purchases the TASER.
Unfortunately, many agencies have given officers little or no training on how to defend the TASER from a weapon takeaway. Equally lacking is training on how to safely deploy the TASER while defending the firearm. This lack of training is putting officers in danger and creating potential liability issues for agencies nationwide. New defensive tactics and weapon retention techniques must be developed to specifically address this reality. With this information in mind, let's take a look at one weapon retention technique many officers have been taught in the past.
Old Techniques Don't Address TASER Defense
A commonly used two-handed weapon retention technique has saved many officers' lives. But by defending the firearm alone, it gives the suspect an open avenue to take the TASER from the officer's duty belt. If the suspect fires the TASER first, the officer might not get the chance to defend himself with his handgun. Given this reality, law enforcement trainers need to rethink some of the weapon retention techniques currently being taught.
In a desire to increase officer safety, I have developed a simple system for teaching officers how to defend not only their TASER, but all of the weapons systems on their duty belts.
By using your arms to push and to create a defensive wedge, you can circle to the suspect's back to keep him away from your firearm and your TASER. With this technique, you can create the distance you need to deploy the TASER. It is important to note that you should not drop both hands when you draw your TASER from your belt. This detail will increase officer safety.
The advantage of this technique is that it sets up a TASER application to the suspect's back. An application to the suspect's back ensures the suspect will not be hit in the eyes or throat with the barbed TASER darts. When hit in the back with TASER darts, there is a greater incapacitating effect due to the large muscles located there.
TASERs Require More Time
Most agencies require officers to carry the TASER on the opposite side of the handgun on the officer's duty belt. This is logical because there have been cases where officers who carried TASERs on the same side as their handguns accidentally drew their handguns instead of the TASERs and fired. However, offside carry adds precious seconds to the time it takes the officer to draw and accurately shoot the TASER.
After testing several different holsters and experimenting with different ways of drawing the TASER, I have found it takes the average officer approximately twice as long to draw and fire a TASER device as it does to draw and fire a firearm. In training, the length of time it takes to draw the TASER must be addressed.
[PAGEBREAK]
Don't Get Too Close
Another factor that should be considered is how close you are to a suspect. The optimal distance for deployment of the law enforcement TASER is seven to 15 feet. Unfortunately, most suspect contact happens closer than that. How do you move to a distance of seven to 15 feet and safely deploy the TASER on an actively resting suspect?
One answer is for you to push the suspect away before deploying the TASER. Since pushing is a gross motor skill, it is a technique that officers can do under stress. Experienced defensive tactics instructors will tell you that many street fights start out with pushing motions. Why not use this natural reaction to a threat to increase officer safety by creating distance?
Create Tactical Distance
By pushing the suspect away, you'll have more time to safely access and deploy your TASER. I call this concept "creating tactical distance." It is the first concept in my method of teaching the defense and deployment of the TASER.
In most cases, the first step should be to create a "defensive wedge" with your arms by placing one hand on top of the other and pushing on the suspect's upper torso, preferably on the suspect's shoulder area. When creating the "defensive wedge," look through the wedge you've created with your hands, not over it. By doing this you bring your head down, automatically protecting your chin. Protecting the chin will keep you from getting knocked out during any ensuing fight. Be sure to use your whole body to push the suspect away when performing this technique.
Obviously, there are situations where pushing the suspect away is not the best option. If the suspect is accessing his own weapon, pushing him away should not be the first choice. However, in the vast majority of circumstances, distance gives the officer valuable reaction time and an expanded field of vision to deal with the threat or multiple threats.
[PAGEBREAK]
Weapons Safe Position
The second concept I advocate is gaining a position of control I call "weapons safe" if you are unable to push the suspect away. When you are in the weapons safe position you can defend your firearm and your TASER.
Rather than using both hands to defend your firearm from a takeaway, the weapons safe position focuses on the suspect's arms. To perform the technique, put one arm under the suspect's armpit and then grab the back of your own neck. Many defensive tactics systems refer to this as "under hooking" the suspect's arm. This keeps one of the suspect's arms away from your duty belt.
With your other arm, place your palm on the suspect's bicep, keeping the suspect's other arm away from your waistline. This position keeps both of the suspect's hands away from your duty belt, protecting all of your weapons systems. One of the advantages of this position is that it gives you a path to escape and a set up for a TASER application to the suspect's back. All you have to do is push the suspect away while you lift up the elbow you have under hooked on the suspect. This will set up a TASER application to the suspect's back.
One very important point to remember is that the weapons safe position should only be used when you cannot push the suspect away using your hands, feet, elbows, head, or anything else at your disposal.
The tactics I have outlined offer logical solutions to the dilemma of defending your TASER and your firearm. It should be noted that the techniques shown in this article are just a small part of an integrated system of weapon retention and arrest techniques specifically developed to defend and more efficiently use the TASER. It is my hope that agencies will recognize the need to create new techniques and tactics to increase officer safety regarding TASER weapon retention.
Mike Siegfried is a detective with the San Bernardino County (Calif.) Sheriff's Department. He holds two black belts and is a defensive tactics and firearms instructor who provides training for various law enforcement agencies.
More Weapons
GOSAFE Technology Announces Public Safety Initiative Focused on Firearm Security and Risk Reduction
GOSAFE Technology’s new initiative provides support for agency-level solutions around secure firearm storage, vehicle-storage risks, off-duty firearm security, firearm accountability, and the public safety consequences that may result when firearms are stolen, lost, improperly secured, or diverted from lawful possession.
Read More →
Texas Sheriff’s Office Deploys RFID-Based User-Authenticated Firearm for Prisoner Transport Operations
A sheriff’s office in Texas is now using RFID-based user-authenticated firearms, from Free State Firearms, for prisoner transfer and transport operations.
Read More →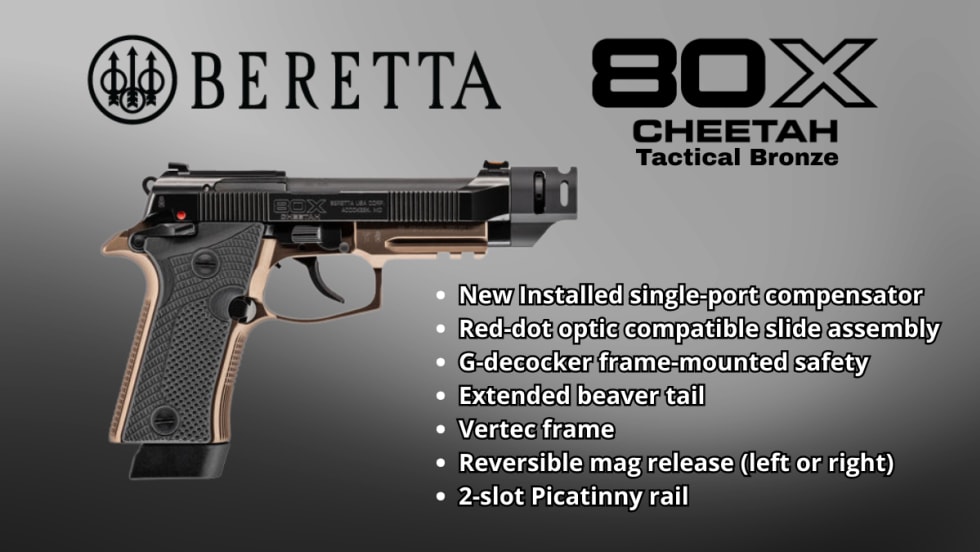
Beretta Introduces the 80X Cheetah Tactical Bronze
Beretta has launched the 80X Cheetah Tactical Bronze, which features a fiber-optic front sight, a serrated rear sight, and a Picatinny rail for accessory mounting, and ships with three 15-round extended magazines.
Read More →
Wrap Raises $5 Million to Restart Domestic Manufacturing & Advance R&D
With new funding, Wrap Technologies will restart domestic manufacturing, advance validated R&D programs into commercialization, and responsibly accelerate early growth initiatives aligned with rising demand for non-lethal response capabilities.
Read More →
Streamlight Celebrates the 20-Year Anniversary of the TLR Series
This year, Streamlight marks two decades of weapon-mounted lighting innovation with the 20th anniversary of the TLR-1.
Read More →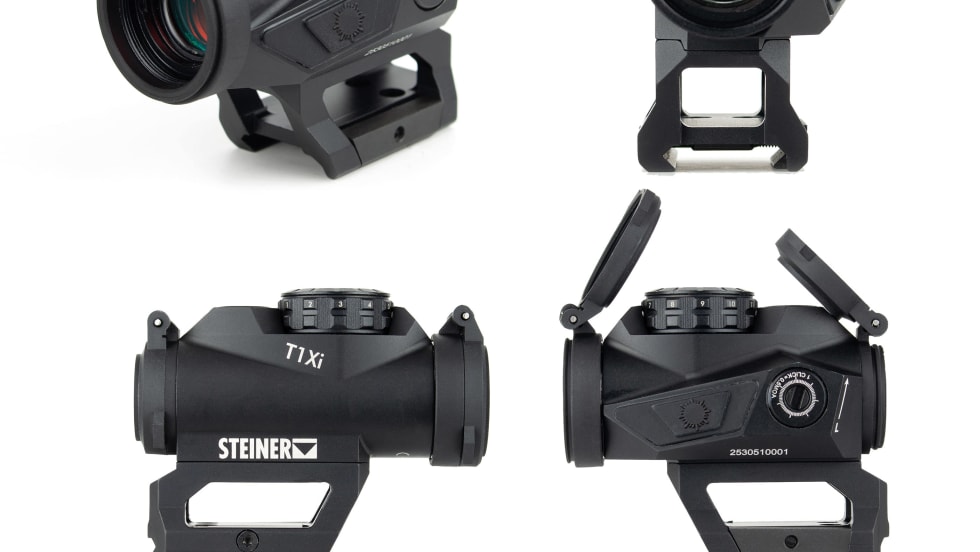
Steiner’s T1Xi Selected as Top Performer in Texas DPS Optic Evaluation
Steiner Optics’ T1Xi was selected as the top-performing red dot in the recent Texas Department of Public Safety optic evaluation.
Read More →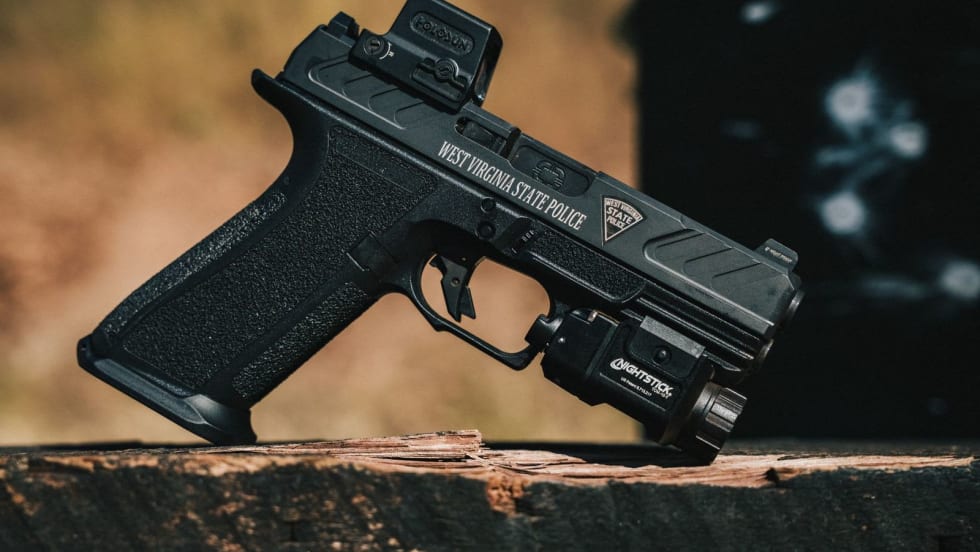
Shadow Systems Selected as Exclusive Pistol Provider for West Virginia State Police
Shadow Systems will provide 700 XR920 crossover pistols for West Virginia State Police troopers and 80 CR920X high-capacity subcompact pistols for the Bureau of Criminal Investigation.
Read More →
Aimpoint Celebrates 50 Years of Innovation and Excellence in Sighting Technology
Aimpoint is marking its 50th anniversary in 2025, celebrating five decades of red dot innovation trusted by military, law enforcement, and tactical professionals worldwide.
Read More →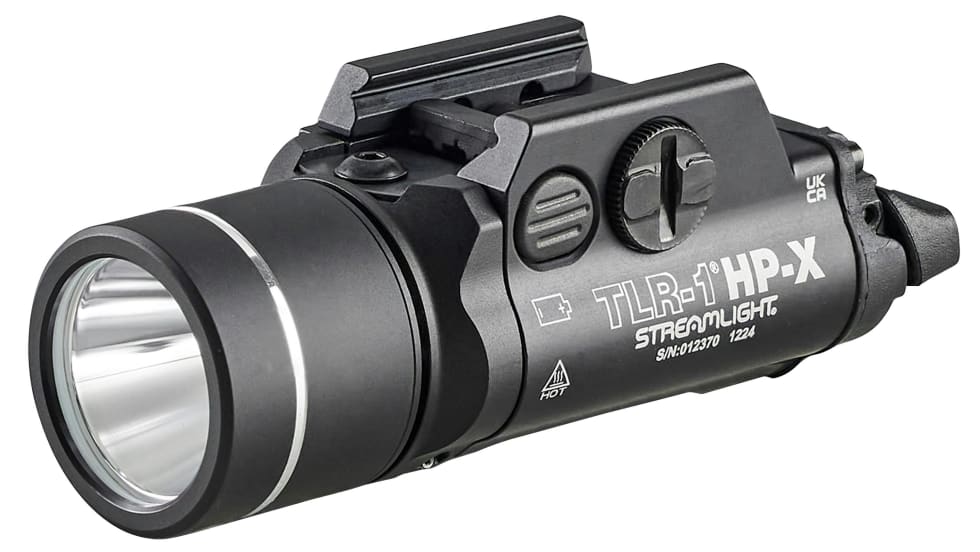
Streamlight Introduces Long-Range Handgun Light
“Our newest weapon light provides an industry-leading level of candela for handguns, giving users enhanced visibility under low light conditions, such as when searching a dark alley,” said Streamlight President Michael F. Dineen.
Read More →
Georgia Sheriff Warns Criminals They Face Felony Charges for Having Glock Switches
This device by itself, regardless if it is installed on a slide or not, is classified by the ATF to be a machine gun, which is illegal to possess,” the Bibb County Sheriff’s Office said.
Read More →