There are numerous techniques for using a handgun and a standalone flashlight in a low-light tactical situation. Here's a look at six of the most popular techniques how to do them and their pros and cons.--Text Ed Santos and David Griffith. Photos: Ed Santos
Pros and Cons of Handgun and Flashlight Techniques
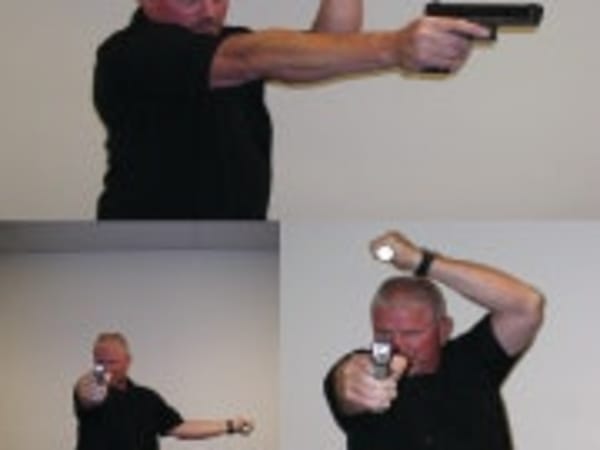
Modified FBI—This is one of the oldest handgun and flashlight techniques and the only widely used technique where the shooter holds the light away from his or her body. To effect this method hold the flashlight in a spear or "icepick" grip in your non-shooting hand then extend your non-shooting arm away from your body, up and to the side. Pros: Light held away from body. Improved manipulation of light for search. Allows searching without muzzle sweep. Peripheral light illuminates sights and target. Cons: Limits user to one-handed shooting grip. Can draw fire to head. Fatiguing.
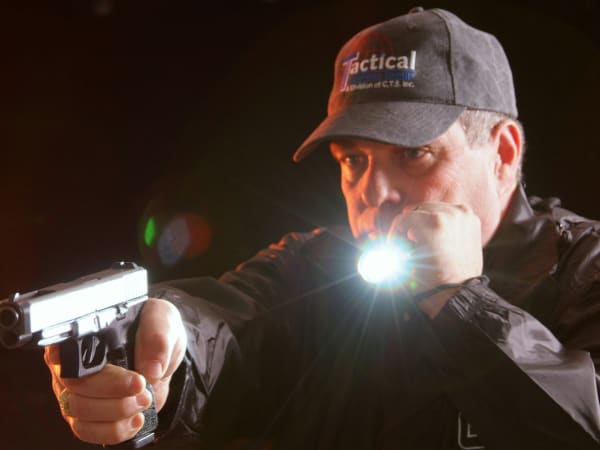
Neck Index—Draw your handgun and hold it in a one-handed grip, then draw your flashlight, grip it in your non-shooting fist, and position the light against your neck on your non-shooting side. Now as you sweep with your body and your gun hand, your head and neck will naturally follow and so will the beam of your light. Pros: Works with small or large lights. Works well with tail cap-activated lights. Allows simultaneous illumination of both your sights and the target. Easy to search without muzzle sweep. Easy to transition into flashlight strike. Cons: Limits user to one-handed gun grip. Can draw fire to head. Can create excess flash on sights.
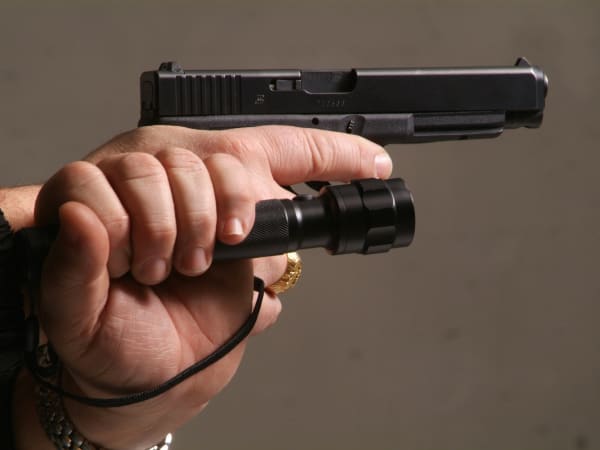
Harries—Hold the handgun at a low-ready position. With your non-gun hand, grip the flashlight in a reverse grip with the lamp protruding from the bottom of your fist and the butt of the flashlight protruding from the thumb side. Rest the hand holding the flashlight under the hand holding the pistol with the backs of the hands facing each other and the light and the gun pointed in the same direction. Pros: Works well with large and small lights. Good with Weaver stance. Stable gun platform. Cons: Beam displacement. Light at center mass. Possible muzzle sweep.
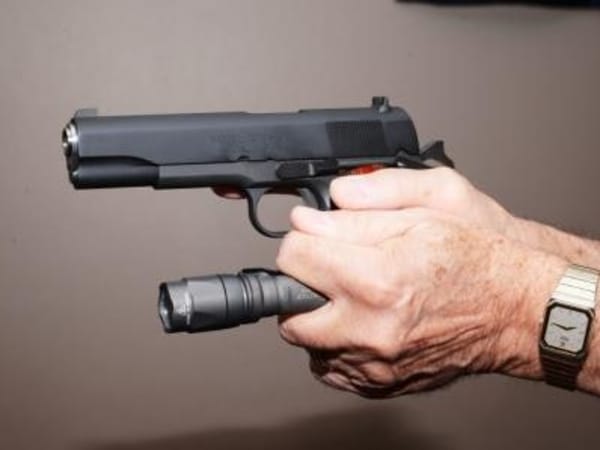
Rogers/SureFire—Created for small, very bright flashlights. The handgun is held in the standard two-handed combat grip, and the tail cap activated light is held between the index and middle fingers. Also called the "syringe" technique. Pros: Rapid deployment from holster. Good beam alignment. Two-handed weapon support. Cons: Only works with small tail cap-activated lights. Sympathetic contraction can cause accidental discharge. Light positioned at shooter's center mass.
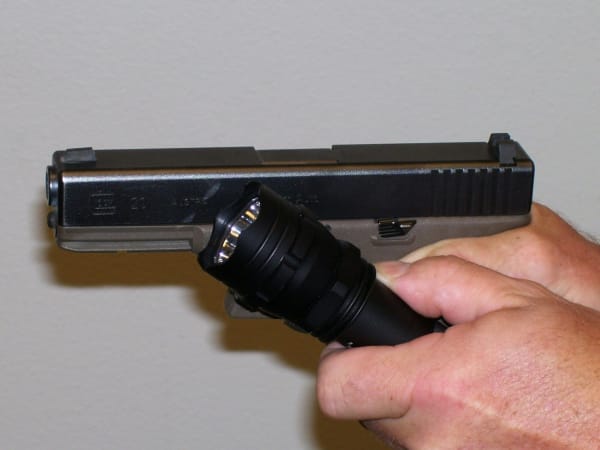
Ayoob—Named for firearms instructor and author Massad Ayoob, the Ayoob Technique uses a sword grip and the shooter hold the flashlight parallel to the handgun with an overhand grip. The thumb of the hand holding the light and the thumb of the hand holding the gun both point toward the target though the flashlight beam points up. Pros: Works with a sword grip. Can be held close in. Cons: Works only with side-switch lights. Holding the light and gun in this matter is fatiguing. Weapon can bang the light. Light at center mass. Beam points up.
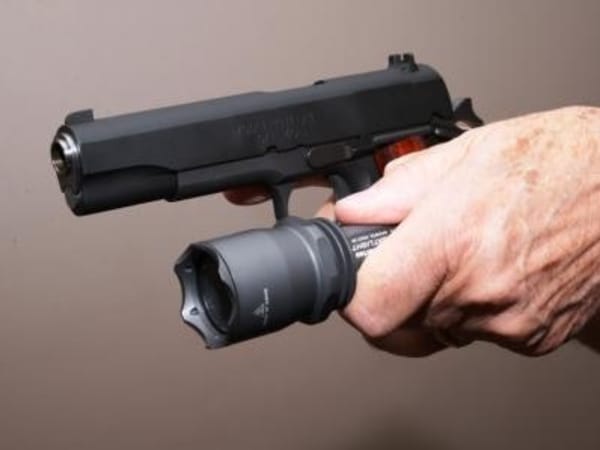
Chapman—The Chapman Technique lets you grip your handgun normally while holding light. With your non-gun hand hold the flashlight with the head close to your hand. Your thumb and forefinger should wrap the barrel of the flashlight, with your thumb on the switch. The remaining three fingers of your support hand wrap around the fingers of your gun hand to attempt a stable two-handed grip. The light beam should be held parallel to the barrel of your gun. Pros: Sword grip. Works close-in. Cons: Side-switch lights only. Tiring. Weapon tends to bang light. Light at center mass.

