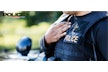
All holsters are not created equal. You know that. You also know that different types of holsters are designed to be used for different police applications. But what you may not know is how to evaluate holsters for quality, fit, retention, and general function.
Every cop should know how to evaluate a holster. This is true whether your agency lets you buy your holster from an approved list using your personal equipment allowance or it simply issues one. And it’s especially true if you are involved in making the decision about which holster your agency will issue to its officers.
No officer who has spent time on the street working in full duty gear will question why the greatest of care should be taken in choosing a holster. A good holster and belt combo can increase your effectiveness and minimize the discomfort of carrying all that gear. A bad holster and belt combo can make your day a misery and, in certain extreme cases, endanger your life.
It’s important that you have the right holster for the job and that you train with it to gain skills that you will need when things go bad on the street. Drawing and reholstering should be second nature to you from a variety of positions and with either hand. You should also take care to ensure that the gear on your belt does not interfere with your ability to access your duty pistol under stress.
Officers have been wounded or even killed because of improper, poorly designed holsters, and their own lack of familiarity with their holsters. About the worst thing that can happen to you in a gunfight is to have trouble drawing your gun.
The successful deployment of gear hinges on three actions: choosing the right equipment for the job, proper supervision of officers using that gear, and training so that officers gain familiarity with the gear. If you skip any of these steps or cut them short, then you compromise officer and public safety.
As veteran officers and police trainers, we’ve put a lot of thought into developing an efficient protocol for the selection of holsters. We’ve also created training programs that will help officers transition to a new holster. And we’ve worked with law enforcement managers and executives, teaching them how to perform ongoing reviews and evaluations of their agencies’ existing duty gear.
So let’s take a look at our evaluation protocol and discuss ways to improve your selection and testing of holsters. Note: The primary focus of this article is duty holsters with retention systems, but most of what we are about to discuss is applicable to other types of holsters.
Selection Protocols
Holsters are no different than any other piece of equipment. There is not one right kind of holster for all officers. A holster must fit the duty assignment of the officer wearing it. For example, different holsters may be needed for the patrol officer, the plainclothes detective, the bike officer, the court officer, the tactical operator, and the list goes on and on. There is no one specific style of holster that fits all functions.
On some agencies that issue holsters to their officers, the gear is selected by administrative protocol. This selection is primarily based on price, appearance, and estimated service life. This means that holster selection is made by the fiscal management/accounting departments, not the end user. Often the evaluation process consists of nothing more than reviewing the manufacturers’ and suppliers’ marketing material.
A better way to go is to select holsters based on an operational protocol that is conducted by the end users or the supervisors of the end users. Operational protocols should reveal how the equipment will function in the duty environment in terms of durability, accessibility, and security.
Evaluation Protocol
There are a lot of ways to evaluate a holster. The following is a detailed explanation of our method. If you are evaluating holsters for an agency, the manufacturers will gladly provide you with their products for testing. If you’re an individual officer who is thinking of switching holsters, about the only way to make this evaluation is by testing it yourself.
Warning: To prevent accidental discharges, do not use real pistols for pull tests. Also, we strongly recommend that you use non-functional metal training guns rather than the non-functional plastic firearms for this testing. With pull tests, the “hardness” of the firearm needs to be as close to the real thing as possible.
Retention Testing
Tree Pull Test—Secure the holster on a duty belt; then strap the duty belt around a tree. Now stand at different angles to the tree to simulate a rear, side, and front pull. Use two hands and make three jerk and pulls for an average of one second each.
This is an excellent simulation of someone trying to disarm you. So obviously retention is one of the critical concerns that you are evaluating with this test.
But there’s more to it than that. It’s great to have a holster that can prevent the bad guy from taking your gun. However, a critical concern that’s often overlooked is the effect of a disarming attempt on the operation of the holster. Once you have tried to disarm the tree, be sure to strap on the holster and evaluate whether the “firearm” can still be drawn and re-holstered properly.
The tree test will tell you many things about a holster. It will help you evaluate the protection provided to your firearm inside that holster, the durability of the belt shank and holster, and expected serviceability of the holster and belt.
Officer Pull Test—You can only simulate so much using a holster strapped to a tree. So have one of your officers put on his or her duty gear, the holster to be evaluated, and the non-functional training firearm and holster.
Now have another officer or volunteer stand at different angles at the rear, side, and front of the officer and using two hands give three separate jerk and pulls, trying to yank the firearm out of the holster. Have at least three different volunteers of various heights and weights try to disarm your officer. Also, have your officer assume a variety of positions, including standing, kneeling, sitting, supine, and prone.
As you did with the tree test, once the disarming exercise is complete, attempt to operate the holster to evaluate whether the firearm can be drawn and re-holstered correctly without jeopardizing holster integrity. This tests the protection the holster provides the firearm, along with the durability and serviceability of the holster and belt system used.
Access Testing
This test is conducted in the various positions an officer may find him or herself in on duty, including standing, kneeling, sitting, on the ground, supine, prone, and sitting in a vehicle.
Wear your assigned duty gear, including ballistic vest. Then draw the training firearm, scan from left to right with the firearm drawn, and then secure the firearm. Repeat this drill in all positions with your gloves on and with bare hands. Once you have completed this drill with your gun hand, do it again with your non-gun hand.
Now, perform a series of draws while standing, kneeling, sitting, supine, prone, and while sitting in a vehicle. Draw with your gun hand barehanded and with gloves. Then do it again with your non-gun hand.
This may seem like an awful lot of trouble to go through just to evaluate a holster. But it’s important to remember that your holster is more than just a carrying case for your gun. It is also a critical piece of survival gear and the only way to know how this gear will function when the chips are falling is to test it under real-world conditions or as close to real-world conditions as you can simulate.[PAGEBREAK]
When to Change a Holster
In many cases, departments consider duty gear to be a one-time purchase, meaning the purchase should last the officer’s entire 20- to 25-year career, under normal circumstances.
The problem with this approach is that it doesn’t account for advancements in duty gear technology. In recent years, we have not only seen a variety of new retention holsters, we have also seen a growing demand for lighter, more comfortable duty belts.
Transitional Training
The following is a training regimen that we would recommend you follow when transitioning to a new holster.
Start with a basic orientation. If an entire unit or agency is switching its gear, this can be accomplished in a classroom. But a single officer making a transition to a new, agency-approved holster should also follow this procedure.
To keep things simple, we’re going to address the rest of this section to individual officers. If you are a trainer or supervisor, you will easily be able to adapt these training instructions to suit the needs of your officers.
Make sure that you know how the holster operates, how to draw and reholster, and how the holster needs to be placed/stabilized on the duty belt in conjunction with other duty equipment.
Once you understand the operation of the holster, it’s time to practice drawing and reholstering your weapon. It’s critical that you build skills drawing and reholstering before progressing to more complicated training.
After you have achieved proficiency with basic drawing and reholstering from the new holster, it’s time to work on non-traditional drawing positions and support hand drawing drills. Since not all drawing and reholstering of the firearm is going to take place in a standing position or with the strong hand, alternative drawing positions and draws must be practiced prior to real-world confrontations where both operator and equipment limitations may lead to tragedy.
Remember that when you are on the job, unless you are plainclothes, you will be wearing a full uniform and your ballistic vest and duty gear. You need to make absolutely certain that you can draw your weapon from your new holster in the field and that none of your gear or clothing will impede your draw or your reholstering.
So once you are comfortable drawing and reholstering your firearm from your new holster, put on your uniform and your vest, outerwear, gear, and gloves. Now practice drawing and reholstering from a variety of positions and stances. We call this the “dress rehearsal.”
You are now ready for the most important phase of the transitional training. Can you draw and reholster your weapon quickly and effectively under stress during an unchoreographed, unrehearsed simulation? Have some friends work up a role-playing scenario or use a simulator for this test. If you can draw and reholster your weapon successfully under stress, then you and your holster are now truly ready for the street.
Putting It All Together
Buying a new holster for yourself or for an entire department is not a task to be taken lightly. The holster must be evaluated for safety, durability, appearance, and, most importantly, utility. Then, once the holster is selected and acquired, you will have to train with it until drawing and reholstering are second nature.
If you are a trainer, supervisor, or administrator who is outfitting a number of officers with new holsters, you should keep in mind the professional management paradigm. The rule here is that maximum officer preparedness can be achieved by choosing equipment, in this case, holsters, with protocols that provide a fair and comprehensive evaluation, by requiring officers to train with the new equipment before using it in the field, and by making sure that each officer has adequate supervision.
But please remember that all officers are still responsible for their own safety. Each individual officer needs to take the equipment in hand, use it, evaluate it, train with it, and properly place/stabilize it on his or her belt in conjunction with other equipment.
Dave Young has served more than 20 years as a military and civilian law enforcement officer. He is the director of specialized programs for the Tactical Training Division of Fox Valley (Wis.) Technical College and a member of the Police Advisory Board.
Gary T. Klugiewicz served 25 years with the Milwaukee County Sheriff’s Department, retiring with the rank of captain. He is the director of training for the Tactical Training Division of Fox Valley (Wis.) Technical College.[PAGEBREAK]
Holster Retention Levels
The levels one to three assigned to holsters by manufacturers are somewhat subjective. There is no industry standard. Nor is there any uniform testing like there is with the NIJ standard for ballistic vests.
Following are the generally accepted definitions of holster retention levels.
Level 1—You or anyone else can just grab the weapon and draw it from the holster. The weapon is retained inside the holster by the holster’s mold, configuration, design, and tension. The primary police application for level 1 holsters is for plainclothes operations that require concealment or for backup guns.
Level 2—These holsters add a thumb break (safety strap) retention system that holds the gun in place. You will find level 2 holsters in all police applications.
Level 3—Also known as retention or security holsters, these holsters feature mechanisms that provide another level of protection to safeguard the weapon. That means the wearer must rock the weapon in a special way or push a lever or button to effect a draw. These holsters are primarily designed for patrol officers, although smaller concealment models are also popular with plainclothes officers.
More and more officers are choosing holsters with more retention features and here’s why:
FBI statistics show that, in the 10-year period from 1992 to 2001, 48 police officers were killed with their own handguns after losing them to a subject.
Remember, at any time during a physical encounter during which you and a subject are in a struggle, the subject has the same access to your duty weapon as you do.
Warning: Play It Safe When Using Real Guns
Unless you are on a range, drawing and firing at targets, always practice holster drills with inoperable training guns such as Blue Guns.
If you don’t have access to training guns, or you feel like you need to practice with your actual firearm, be sure to follow these rules.
Clear your weapon. Make sure there is no live ammunition on your person or on your duty belt. Then, to be absolutely safe, put an Ammo Safe in your gun.
Ammo Safe is a plastic device that’s chambered to fit your gun. It costs less than $5, and it prevents the introduction of any live ammunition into your weapon. With an Ammo Safe in place, you can cycle the weapon and even pull the trigger without worrying about an accidental discharge.
You know an Ammo Safe is in a gun because a long, brightly colored plastic whip protrudes from the muzzle. The whip may hinder drawing and reholstering. If it does, you can cut it. But don’t cut it so short that you can’t see it.
www.ammosafe.com
The Tragedy of Officer Molly Bowden
When worn properly, a retention holster can provide you with an extra layer of weapon security. However, if care isn’t taken to ensure that the holster and gear are properly positioned on your belt, a retention holster can prevent you from drawing your weapon to make a timely response to a threat.
Investigators believe an improperly worn retention holster may have been a contributing factor in the murder of Officer Molly Bowden of the Columbia (Mo.) Police Department.
On the night of Jan. 10, Bowden, 26, effected a traffic stop near a busy intersection in Columbia. Police say that Bowden was asking the driver, 23-year-old Richard Thiel Evans, for his license and registration when he produced a handgun and fired on the officer.
Bowden took cover behind her patrol car. Evans got out of his car, and a gunfight should have ensued. Except Bowden could not get her gun out of her holster. Police say that Evans mortally wounded Bowden while she struggled with her holster. She died a month later.
Evans killed himself the day after the incident when police tried to arrest him at his parents’ home. Officer Curtis Brown was shot in the arm during the operation.
Subsequent analysis of Bowden’s gear and patrol car videos of the incident revealed that the placement of equipment on Bowden’s duty belt had prevented her from drawing her weapon.
The Columbia PD issues triple-retention holsters that have a rear snap. Bowden kept her collapsible baton on her belt behind her gun, and she did not have a belt keeper between the baton and the holster. It’s believed that her baton shifted forward so that it came between the belt and the rear snap of her holster. With her baton in that position, Bowden could not draw her firearm.
Nationwide, police firearms instructors are talking to their officers about this tragedy and providing belt keepers. If you wear a holster with a rear snap, be sure to check the positioning of your equipment.