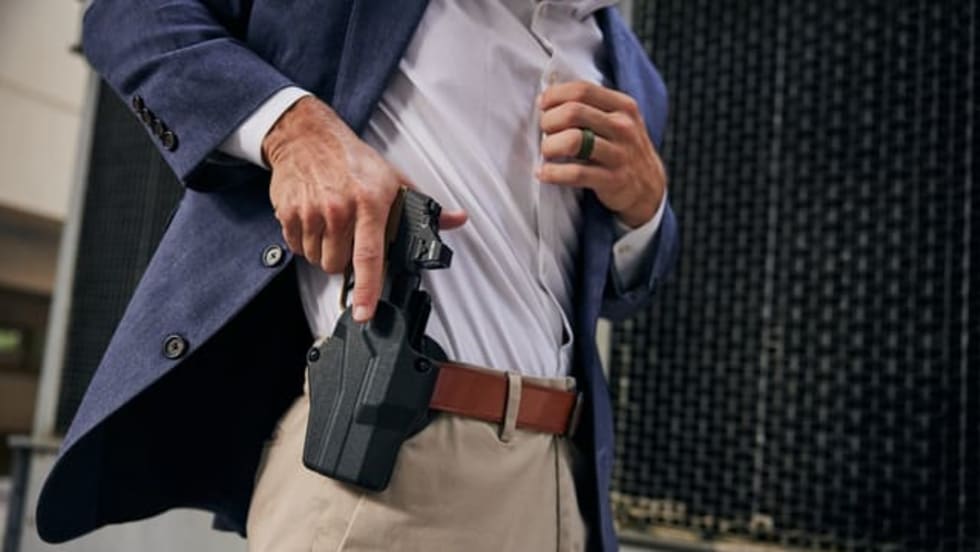
Editor's Note: View our photo gallery, "Stopping Gun Grabs: 3 Scenarios."
When you make contact with any suspect, there is always a firearm involved. It's on you. And it can be turned against you.
Every year the FBI publishes a report titled "Law Enforcement Officers Killed and Assaulted." This detailed document gives the law enforcement community valuable information about the circumstances and trends in assaults on officers. In 2008, 10 percent of officers killed with a firearm were killed with their own handgun. In the past few months, Officer Ryan Bonaminio of the Riverside (Calif.) Police Department and Dep. Sam Brownlee of the Weld County (Colo.) Sheriff's Department were both killed when they lost control of their duty firearms.
Concepts and Techniques
When asked to demonstrate weapon retention, most officers place both hands on their holstered handgun and move their hips violently from side to side. This technique is good. But before you are able to react in this manner, the suspect can bridge the open space between you, lower his shoulders, and extend his hands to touch your holstered firearm. So why don't officers use a technique that provides a faster reaction? The short answer is they were trained not to.
In many academies, weapon retention is taught by an instructor who says, "The key to weapon retention is to keep your handgun in the holster. Now, let your training partner get close and put his or her hands on your gun, then react." This type of training engrains into your muscle memory the concept that you have to wait until the suspect gets a hand on your weapon before you can perform a weapon retention technique. This type of training ignores the concept that you should not let a suspect get anywhere near your duty belt in the first place.
There should be a balance between teaching techniques and concepts. The basic concept is to not let anyone near your gun. If someone does get near your gun, push the person away and prepare to use one of your weapons. If you cannot push him or her away, keep your weapons on your belt and out of the suspect's hands. Teaching concepts provide the why, distance provides the when, and techniques provide the how.
Three Seconds
In training, officers often say, "If they go for my gun, I will just shoot them." But what if you do not have time? Drawing and accurately firing a handgun takes time, which you might not have. A common reference point for reaction time is 1.5 seconds: the time it takes most human beings to realize there is a serious problem. It takes the average officer another 1.5 seconds to draw a firearm and fire the first shot.
How much damage could a suspect inflict in the 3.0 seconds it takes for an officer to recognize, react, and fire the first shot? I have seen many mixed martial artists knocked out in less time. Even an extremely slow runner could get to an officer before the officer can get their first shot off.
A five-year FBI study, "Violent Encounters: A Study of Felonious Assaults on Our Nation's Law Enforcement Officers," confirms that victim officers hit the suspect only 40 percent of the time in deadly encounters. Additionally, if the suspect gets to the officer before the officer gets his firearm out of the holster, the officer will have at least one hand down. Having one hand down when fighting can have devastating consequences.
Law enforcement trainers need to take a good look at how we teach and train for weapon retention. A layered training approach first addresses concepts, then focuses on four areas: defending with space and angles, defending with the legs, defending with the arms, and keeping the firearm secured in the holster. This concept of firearm retention has been referred to as "defense in depth."
Open Space and Angles
From a modern firebase in Afghanistan to an ancient castle, the first layer of defense is a large open area from which the defender can see the enemy coming and engage them from a distance. This open space concept can also work for individual officers.